How to Install a Wood Strip Wall?
A Wood Strip Wall can add warmth, texture, and a clear focal point to a plain room. The finished surface may look simple, but good results depend on careful planning. Wall condition, strip spacing, wood type, and fastening method all affect the outcome. A slightly uneven wall can leave visible gaps, even when each strip seems straight.
This guide explains how to prepare the surface, measure a layout, cut the strips, and attach them securely. You will also learn how to check for studs and hidden services before drilling, and how to choose fasteners or adhesive suitable for your wall and wood. Follow product instructions, wear eye protection when cutting, and test your layout with a few temporary marks before committing. Small errors show.
Keep a level, tape measure, pencil, and saw close at hand. Dry-fit several strips first. That matters. Wood can vary in color and width, so inspect each piece and arrange the pattern before installation. Leave appropriate room for natural movement, especially in changing indoor conditions, and avoid forcing bowed boards flat without checking the cause. Not every wall is perfectly square; mine certainly wasn’t. A careful layout can hide minor irregularities, but it cannot correct a damp or damaged surface. If the wall has persistent moisture or loose plaster, address that problem before adding a finish. With realistic preparation and steady checks, even a first-time installer can create a neat, durable feature wall.
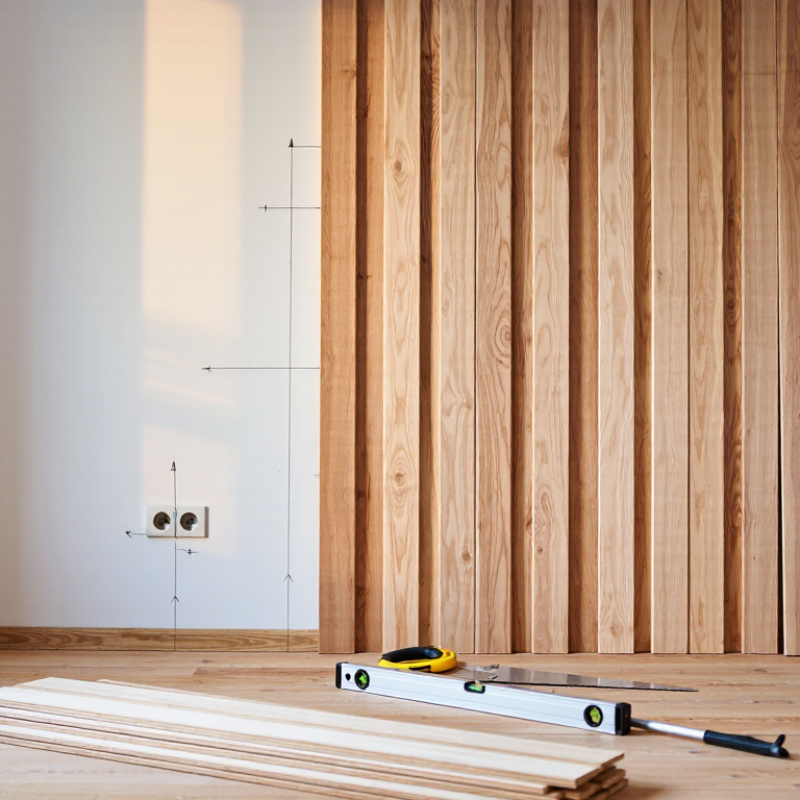
Assess the Wall and Plan the Wood Strip Layout
Before installing wood strips, check the wall for damp patches, loose plaster, and noticeable humps or dips. Hold a long level against several areas; even small uneven spots can make strips twist or leave visible gaps. Locate studs with a stud finder, then mark their centers lightly in pencil. The 2021 International Residential Code’s framing provisions show that stud spacing varies with wall conditions; 16 inches on center is common, but verify your actual wall.
Plan the layout before cutting. Measure the wall’s width and height, then test strip spacing on paper or with a few loose strips. Center the pattern where possible, and check how the final strip meets corners, doors, and outlets. Wood also responds to indoor humidity. The USDA Forest Products Laboratory’s Wood Handbook (FPL-GTR-282, 2021, Table 4-2) lists equilibrium moisture content near 9.2% at 70°F and 50% relative humidity. Let the material adjust to the room, and follow its installation guidance. I’ve learned that skipping this check can mean redoing careful cuts.
Tips: Snap a level reference line, not just a line that follows the floor. Photograph stud marks before covering them. Leave room for edge adjustments; walls are rarely as square as they look.
Gather Materials and Prepare the Wall Strips
Gather straight, dry wood strips, plus a tape measure, pencil, level, stud finder, saw, and fine-grit sandpaper. Choose fasteners that suit both the wall and the wood. Keep a small offcut for testing paint or stain. Check each strip for twists, rough edges, and knots that could weaken a fixing point. Let the wood rest in the room for a few days, especially if it arrived cold or damp. It may still shift slightly; that part is easy to underestimate.
Prepare the wall before laying out the strips. Remove dust and loose paint, then fill holes and let repairs dry fully. Use a level to mark a reference line, and plan spacing with actual strip widths rather than estimates. Find studs before drilling, and check for hidden wires or pipes where you plan to fasten. Cut a sample strip and test the layout at eye level. A pencil line can look right on the floor and feel crowded on the wall.
Tips: Sand cut ends before installation; splinters are harder to manage later. Keep spacers consistent, and recheck the first few gaps with a ruler. If using adhesive, confirm it is suitable for the wall surface and wood, and follow its curing directions. Don’t rush the prep. I sometimes find one bowed strip only after arranging the whole set, which means checking each piece again is worth the extra minute.
How to Install a Wood Strip Wall? - Gather Materials and Prepare the Wall Strips
| Category | Material or Task | Typical Specification or Quantity | Purpose and Preparation Notes |
| Planning example | Wall area | 8 ft high × 10 ft wide (about 80 sq ft) | Use the actual wall measurements to calculate strip lengths and quantities before purchasing materials. |
| Wood strips | Solid wood strips | About 60 strips, each 8 ft long, plus roughly 10% extra | Example assumes strips with an actual face width of 1.5 in and 0.5 in gaps across a 10 ft wall. Confirm the actual dimensions of the selected lumber; nominal board sizes may differ from finished sizes. |
| Layout | Strip spacing | 0.5 in example gap | Choose a consistent gap that suits the design. Mark the intended strip positions and check the layout at both ends of the wall before installation. |
| Fastening | Suitable fasteners | Quantity depends on strip length and wall framing | Select fasteners appropriate for the wood and wall construction. Locate wall studs where possible, and use a compatible fixing method for the substrate. |
| Tools | Tape measure, level, pencil, saw, drill or nailer | One of each; use eye and hearing protection when cutting or fastening | Use the level to keep strips plumb and the measuring tools to mark repeatable spacing. Follow tool safety instructions. |
| Wall preparation | Inspect and clean the wall | Entire installation area | Remove dust, loose paint, and obstructions. Repair and let any patching compound dry before installing the strips. |
| Wall preparation | Check for moisture and damage | Before covering the wall | Do not cover a damp or damaged surface. Address the source of moisture and allow the wall to dry fully. |
| Wall preparation | Locate studs and services | Mark stud positions; check for concealed wiring and plumbing | Use an appropriate detector and work carefully before drilling or nailing. Avoid fastening where concealed services may be present. |
| Strip preparation | Acclimate the wood | Follow the wood supplier’s guidance; keep strips in the installation room beforehand | Store the strips flat, dry, and supported. Acclimation helps the wood adjust to indoor conditions before fitting. |
| Strip preparation | Inspect, cut, and finish | Cut strips to the measured wall height; prepare a small extra quantity | Reject badly warped or damaged pieces. Sand rough edges and apply any desired finish according to its directions, allowing it to dry before installation. |
Planning note: The quantities and spacing shown are an illustrative estimate for an 8 ft × 10 ft wall using strips with a 1.5 in actual face width and 0.5 in gaps. Recalculate for your wall, strip dimensions, openings, and layout.
Mark the Wall and Locate Studs
Before installing a wood strip wall, mark the layout and locate the studs. Start by measuring the wall’s width and height, then decide where the first strip will sit. Use a level to draw a light vertical reference line; even a small tilt can become obvious across the room. Check for switches and outlets, since they can help you anticipate wiring routes. Do not assume a stud finder’s first signal is exact. Scan slowly, mark both stud edges, and mark the center between them.
Tips: Calibrate the stud finder as its instructions describe. Confirm each mark with a second pass from the opposite direction. A tiny test hole can help verify a stud, but check carefully for hidden wiring or pipes first. Keep marks faint and easy to remove.
Extend the stud-center marks from floor to ceiling with a level or plumb line. This gives you a clear guide when positioning strips and choosing fasteners. If the wall is uneven, measure at several heights; studs may not sit exactly where expected, and old walls can surprise you. I would rather recheck a mark than discover the error after attaching several strips. Take a photo of the marked wall before covering it. That small step can save guesswork later.
Install and Secure the Wood Strips
Let the wood strips adjust to the room’s temperature and humidity before installation; this helps limit later movement. Check each piece for bowing, rough edges, or damaged ends. Find and mark the wall studs, then check for hidden pipes or wiring before drilling. A stud finder helps, but verify its readings rather than trusting one pass. Small checks matter.
Plan the spacing with a tape measure and a level, and mark a light guide line for the first strip. It may take a few tries to get that strip perfectly plumb. Use temporary spacers to keep the gaps even, and predrill near the strip ends to reduce splitting. Fasten each strip into the studs with screws long enough to hold securely, without overtightening and crushing the wood. If the wall surface is uneven, correct the backing or use suitable shims; forcing a bowed strip flat can make it spring loose. Adhesive can add support when it is compatible with the wall and wood, but don’t rely on it alone where mechanical fasteners are needed. Recheck the level and spacing every few strips. One gap may still look slightly off. Adjust it before continuing.
How to Install and Secure Wood Strips
Common wall framing often places studs 16 or 24 inches on center. Locate the studs and fasten each wood strip into the framing for a secure installation; check your wall before choosing fastener locations.
Finish the Surface and Inspect the Installation
Once the wood strips are secure, inspect the wall in daylight and with a lamp held at a shallow angle. This reveals raised edges, small gaps, and uneven joints that ordinary room lighting can hide. Press loose strips gently and refasten them before applying filler or finish. Fill only visible nail holes and gaps with a product suited to the wood and chosen finish. Remove excess while it is still workable; hardened filler can leave pale patches.
Sand repaired areas lightly, following the grain, then remove dust with a clean, dry cloth. Test the finish on an offcut first. Wood can absorb stain unevenly, and a test piece helps you judge the color before it reaches the wall. Apply thin coats and follow the product’s drying instructions. Let it dry fully. I once missed a faint sanding mark near a corner; angled light made it obvious after finishing, so take another look before the final coat.
Tips: Keep a small brush nearby for dust in narrow seams. Check corners, trim edges, and strip ends up close. Don’t rush the cure time, even if the surface feels dry.