
Skip to Content
chevron-left chevron-right chevron-up chevron-right chevron-left arrow-back star phone quote checkbox-checked search wrench info shield play connection mobile coin-dollar spoon-knife ticket pushpin location gift fire feed bubbles home heart calendar price-tag credit-card clock envelop facebook instagram twitter youtube pinterest yelp google reddit linkedin envelope bbb pinterest homeadvisor angies

How to Choose Aluminum Profiles for Windows?

Choosing Aluminum Profiles For Windows is not simply a matter of selecting the thickest section or the brightest finish. The right profile must balance strength, thermal performance, appearance, fabrication, and long-term maintenance. A slim frame may look elegant beside large glass panels, yet it can fail when wind pressure, sash weight, or repeated opening cycles are underestimated. The decision begins with the window’s location, dimensions, opening style, glazing weight, and expected service life.

Experienced fabricators usually review alloy grade, wall thickness, thermal-break design, drainage paths, and hardware compatibility together. A profile with a quality polyamide thermal break can reduce heat transfer through the frame. Powder coating or anodizing should match the project’s exposure, especially near humid or coastal environments. Ask suppliers for technical drawings, test reports, coating specifications, and batch traceability. Local building requirements also matter. They may define water tightness, air leakage, structural resistance, fire performance, or energy efficiency.

Small details matter. Poorly positioned drainage slots can allow water to collect inside the frame. An attractive sample may conceal weak corners or inconsistent coating thickness. That happens.

The most reliable choice comes from verified data and practical trial assembly, not marketing language alone. Compare complete system performance rather than isolated profile dimensions. Review installation tolerances with the contractor before placing an order. Even skilled teams sometimes overlook this step. A careful selection process reduces replacement costs, improves indoor comfort, and gives the finished window a more dependable service life.
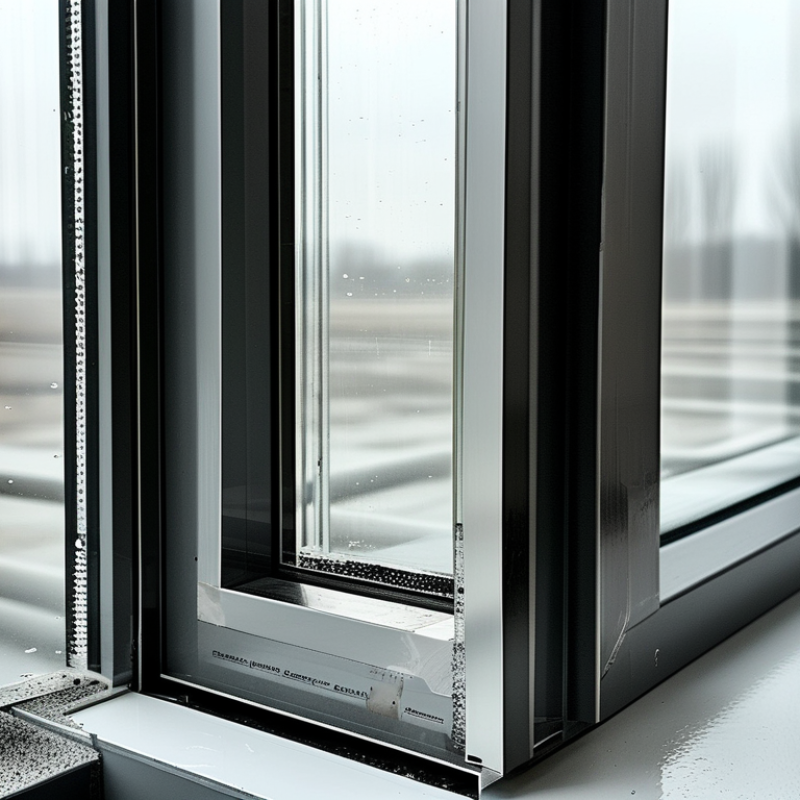
How to Choose Aluminum Profiles for Windows?

Define Window Requirements and Performance Goals

How to Choose Aluminum Profiles for Windows?

Define Window Requirements and Performance Goals

A suitable aluminum profile begins with the building’s actual demands, not a catalogue dimension. Record the opening size, glass weight, wind exposure, rainfall, indoor humidity, and cleaning access. A coastal apartment needs different corrosion protection than a dry inland office. Start there.

The U.S. Department of Energy reports that windows can cause 25% to 30% of residential heating and cooling energy use. That figure makes thermal performance a design priority. Set a target U-factor for heat transfer and a solar heat gain coefficient for sunlight control. Lower U-factor improves insulation, while a lower SHGC can reduce unwanted summer heat. The National Fenestration Rating Council evaluates these values through standardized product testing.

Do not select the narrowest profile automatically. A slim frame may increase glass area, yet it can reduce stiffness or limit drainage space. Check profile wall thickness, thermal-break geometry, gasket compression, and corner strength. Ask for test evidence covering air leakage, water resistance, and structural pressure. These details matter when wind pushes rain against a second-floor window.

Measure twice.

Real projects rarely match drawings perfectly. Uneven masonry, oversized glass, and rushed installation can weaken good profiles. I have seen performance goals fail because the frame was specified carefully but installed without proper shimming. Recheck tolerances on site, and leave room for adjustment. The best specification is still only a prediction until the window survives real weather.

Compare Aluminum Profile Types and Window System Designs

Choosing aluminum profiles starts with comparing performance, not appearance. Standard hollow profiles suit mild climates and compact budgets, but they create thermal bridges. Thermally broken profiles use a polyamide barrier between interior and exterior aluminum. This reduces heat transfer and improves interior comfort. The U.S. Department of Energy reports that windows can cause 25–30% of residential heating and cooling energy use. That figure makes frame design important, not decorative. For large openings, reinforced profiles may resist wind loads better, although they can reduce glass area. Slim profiles look elegant, but their strength and drainage capacity need careful checking.

Window system design changes daily use. Casement and tilt-turn systems usually provide tighter compression seals than basic sliding systems. Sliding windows save interior space, yet their brush seals may offer weaker air control. A narrow-sightline system can increase daylight, but only when glass weight, hardware, and span limits are correctly calculated. The International Energy Agency’s 2023 buildings report links buildings with about 30% of global final energy demand, so designers should compare whole-window U-values, solar heat gain, air leakage, and water resistance. Product brochures often emphasize the profile. That is incomplete.

Tips: Ask for tested whole-window results, not profile-only data. Check thermal-break width, corner joints, drainage paths, glass compatibility, and local wind pressure. Request independent laboratory reports. I would also inspect a full-size sample; small samples hide manufacturing weaknesses. A highly insulated profile can still perform poorly with loose gaskets or careless installation. Recheck the specification before ordering.

Evaluate Thermal Breaks, Insulation, and Energy Efficiency

Choosing aluminum profiles for windows starts with the thermal break, not the frame’s appearance. A continuous polyamide barrier separates the exterior and interior aluminum sections, reducing conductive heat transfer. The U.S. Department of Energy reports that windows can cause 25–30% of residential heating and cooling energy use. That figure makes frame design important. Look for tested whole-window U-factors, not profile claims alone. Lower values indicate better insulation.

Small details matter. A wide thermal break can improve performance, but poor corner joints may create cold spots. Ask for thermal-bridge simulations or certified test results. The National Fenestration Rating Council evaluates U-factor and solar heat gain coefficient, or SHGC, under standardized conditions. In hot climates, a lower SHGC can reduce unwanted afternoon heat. In cold climates, moderate solar gain may support passive heating. Glass selection must match the profile.

Air leakage deserves equal attention. The International Energy Agency’s 2023 Global Status Report for Buildings and Construction states that buildings account for about 30% of global final energy consumption. A well-insulated frame still performs poorly when gaskets compress unevenly or drainage paths leak. I have seen attractive aluminum windows develop interior condensation near uninsulated corners. That mistake is expensive and easy to miss. Specify thermal-break continuity, gasket quality, installation tolerances, and verified test data. U-factor is useful, but it never tells the whole story.

How to Choose Aluminum Profiles for Windows? - Evaluate Thermal Breaks, Insulation, and Energy Efficiency

Profile / System Category Typical Thermal-Break Depth Typical Profile Uf Range Insulation Characteristics Suitable Climate or Application Expected Energy Performance Key Selection Considerations
Non-Thermal-Break Aluminum None Approximately 5.0–7.0 W/m²·K Aluminum conducts heat directly from the exterior to the interior. Condensation risk is comparatively high in cold conditions. Mild climates, unconditioned spaces, interior partitions, and low-cost applications Low; generally unsuitable for high-performance building envelopes Use only where thermal insulation is not a major requirement. Check local energy codes before specifying.
Basic Thermal-Break Aluminum 14–18 mm Approximately 2.5–3.5 W/m²·K Polyamide separators reduce direct heat flow, but the limited break width and profile geometry restrict overall insulation. Warm and mixed climates; residential and light commercial windows Moderate; better than non-thermal-break profiles Confirm the complete window Uw, not only the profile Uf. Glass selection remains highly influential.
Enhanced Thermal-Break Aluminum 20–30 mm Approximately 1.8–2.5 W/m²·K A wider polyamide thermal barrier and improved internal chambers reduce conductive and convective heat transfer. Mixed climates and energy-conscious residential projects Good; can support low-energy window assemblies when paired with suitable glazing Evaluate thermal-break continuity at corners, mullions, meeting rails, hardware zones, and drainage paths.
High-Performance Thermal-Break Aluminum 30–40 mm or more Approximately 1.2–1.8 W/m²·K Deep insulated cavities, multiple chambers, and optimized insulating components significantly reduce heat transfer through the frame. Cold climates, passive-design projects, and high-performance commercial buildings Very good; suitable for demanding thermal-efficiency targets when correctly installed Check tested whole-window values, condensation resistance, air leakage, installation details, and compatibility with triple glazing.
Thermally Improved Sliding Profile 18–35 mm, depending on the design Approximately 1.8–3.0 W/m²·K Thermal barriers improve frame insulation, but sliding tracks, interlocks, and larger air gaps can reduce performance compared with hinged systems. Warm and mixed climates; large openings where ventilation and access are important Moderate to good; depends strongly on interlock design and weather sealing Prioritize air-tightness, water resistance, insulated meeting stiles, and tested performance for the selected opening size.
High-Performance Hinged / Casement Profile 30–40 mm or more Approximately 1.2–2.0 W/m²·K Continuous thermal breaks combined with compression seals generally provide strong resistance to air leakage and heat transfer. Cold climates and buildings with strict energy targets Very good to excellent; often more efficient than comparably sized sliding systems Verify sash-to-frame sealing, corner joints, hardware installation, glass edge spacers, and installation quality.
Aluminum Profile with Insulating Foam or Additional Inserts 25–45 mm or more Approximately 1.0–1.8 W/m²·K Low-conductivity foam or insulating inserts reduce heat flow through hollow chambers and improve the effective frame performance. Cold climates and projects requiring enhanced thermal performance Excellent potential, provided the inserts remain continuous and do not interfere with drainage or hardware Request verified calculations or test reports. Assess fire behavior, moisture resistance, durability, and repairability of inserts.
Important evaluation notes:
  • Uf describes heat transfer through the frame only, while Uw describes the complete window, including the frame, glazing, spacer, and size.
  • Lower U-values indicate better insulation. Values shown are indicative ranges; certified results vary with profile geometry, window dimensions, glazing, hardware, and test method.
  • For balanced energy performance, evaluate Uw, solar heat gain coefficient, visible transmittance, air leakage, water tightness, condensation resistance, and installation quality together.
  • Thermal-break depth alone does not guarantee performance. Continuous barriers, insulated corners, low-conductivity spacers, and correctly sealed joints are equally important.

Check Profile Strength, Dimensions, Finishes, and Compatibility

How to Choose Aluminum Profiles for Windows?

Choosing aluminum profiles for windows starts with strength, not appearance. During site inspections, I check wall thickness, alloy grade, and reinforcement points first. A profile should resist wind pressure without excessive deflection. Larger windows may need stronger sections or internal reinforcement. Ask for tested load data, not confident claims. A sample corner joint often reveals more than a catalogue photograph. Look for clean cuts, tight connections, and movement-free assembly.

Dimensions must match the glass, hardware, drainage path, and opening size. Measure the finished opening at several points because walls are rarely perfect. Allow space for shims and thermal movement. A frame that fits only on paper creates difficult installation work. Check sash depth, glazing thickness, and gasket channels together. Small mismatches can cause leaks, rubbing, or weak seals. I once underestimated sill clearance, and the drainage route became cramped. That mistake changed my measuring checklist.

Finishes should suit weather exposure, cleaning habits, and interior design. Powder coating and anodizing need consistent coverage, adhesion, and color control. Inspect edges, corners, and cut ends, where defects appear first. Compatibility also matters. Confirm that profiles work with the selected glass, seals, locks, rollers, screens, and fasteners. Materials should tolerate local humidity and temperature changes. Technical drawings, test reports, tolerances, and installation guidance improve reliability. Still, documents cannot replace a physical mock-up. Test one assembled window before ordering the full quantity.

How to Choose Aluminum Profiles for Windows?

Check profile strength, dimensions, finishes, and compatibility before selecting an aluminum window system.

The chart compares typical minimum mechanical properties of commonly used aluminum alloys and tempers for architectural profiles. 6063 is widely selected for its extrusion quality and surface finish, while 6061-T6 provides higher strength. Always confirm wall thickness, glazing dimensions, thermal-break compatibility, coating requirements, and applicable local standards before production.

Assess Standards, Maintenance Needs, Suppliers, and Total Cost

How to Choose Aluminum Profiles for Windows?

Start by checking the standards required in your region. Confirm structural strength, air leakage, water resistance, thermal performance, and fire behavior. Ask for recent test reports, material grades, coating specifications, and traceability documents. A profile may look substantial, yet perform poorly around corners or drainage channels. During a project review, I would inspect sample joints, gasket fit, and wall connections rather than trust a catalog image. Local climate matters too. Coastal buildings need stronger corrosion protection, while cold regions require effective thermal breaks.

Maintenance should be measured before purchase. Ask how often the frames need cleaning, whether replacement hardware is available, and how easily damaged seals can be changed. Smooth drainage paths prevent trapped water and reduce staining. Light-colored finishes may show dust quickly, but dark finishes can reveal scratches and heat distortion. These details are easy to underestimate. I once saw a low-maintenance specification fail because the window tracks collected grit after several months.

Evaluate suppliers with the same care as the profiles. Check production capacity, quality controls, delivery records, installation guidance, and warranty terms. Request references from comparable buildings, not only impressive showcase projects. Compare total cost, including fabrication, transport, installation, cleaning, repairs, energy use, and future replacements. The cheapest quotation may hide thin coatings, unusual hardware, or weak after-sales support. A simple lifecycle spreadsheet can expose this difference. Still, cost forecasts are imperfect, especially when labor prices or maintenance habits change. Allow room for those uncertainties.